
Typical UVM Testbench Architecture
A typical UVM testbench contains several components. First, let’s look at a simple UVM testbench diagram.
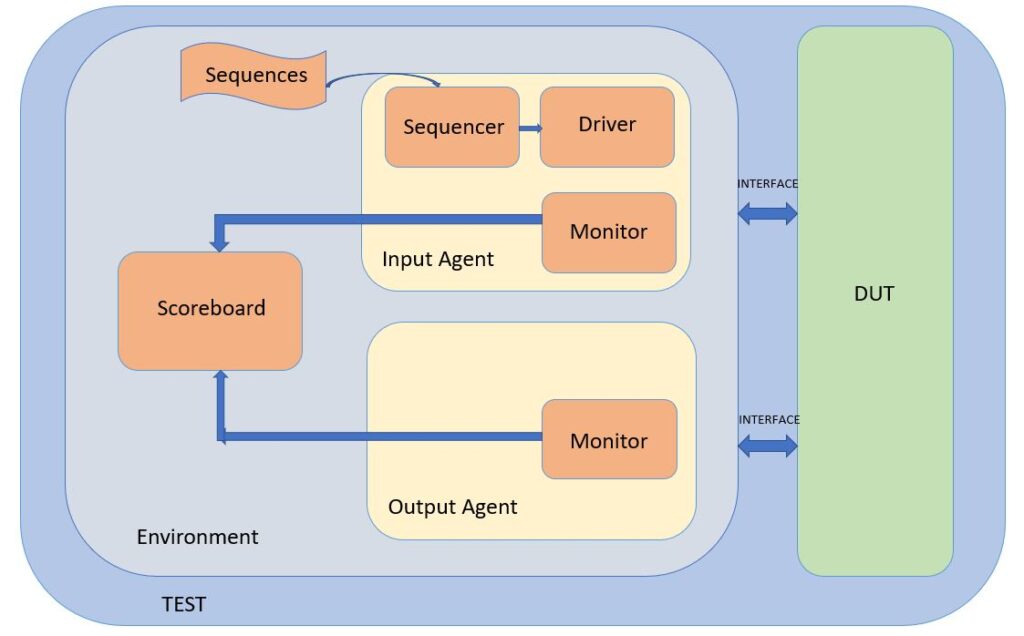
There are several components illustrated within this diagram with the most fundamental one being the agent.
An agent is a container that holds all the needed components for a particular protocol. A typical UVM agent might contain a driver, monitor, and sequencer.
The sequencer controls the flow of sequences that are created either with constrained random or directed data. You can think of a sequence as a packet of data that represents a transaction or protocol. Essentially, a sequencer passes a transaction to the driver.
The driver then drives the interface based on the bus protocol with that transaction. The driver can also send a response to the sequencer, if necessary.
The monitor captures the transactions based on the protocol and can implement checkers to verify the protocol.
All of these pieces, the driver, monitor, etc. are examples of a UVM component. They are reusable pieces of code that together create the protocol you need for your environment.
You will notice that the output agent only contains a monitor. The input agent is called “active” because it is actively driving transactions onto the interface. However, the output agent is “passive.” It is just capturing the transactions and passing the information along to the scoreboard for checking. We’ll explore how to make an agent active or passive later.
In the next posts we will try to develop UVM Components or UVM Testbench to Verify basic RTL Design so stay tuned for the upcoming posts till then stay safe and keep learning .. 🙂


One Comment
Comments are closed.